In a world filled with endless flooring options, vinyl has emerged as a true champion. Its versatility, durability, and affordability make it an incredibly popular choice for homeowners and businesses alike.
Whether you have vinyl sheeting in your kitchen or stylish vinyl planks throughout your home, keeping them clean and well-maintained is essential to preserving their beauty and longevity.
If you’re wondering how to keep your vinyl floors looking pristine without breaking a sweat, you’ve come to the right place! In this comprehensive guide, we’ll walk you through the step-by-step process of how to clean vinyl floor like a pro.
From choosing the right tools to mastering the mopping technique, we’ve got all the tips and tricks you need to ensure that your vinyl floors shine brighter than ever before.
So roll up those sleeves, grab some cleaning supplies, and let’s dive into the wonderful world of sparkling-clean vinyl flooring!
Understanding Vinyl Flooring: What is It and Why is It Popular?

Vinyl flooring, also known as resilient flooring, is a synthetic material that mimics the look of natural materials like wood or stone. It consists of multiple layers that work together to create a durable and versatile surface for your home.
The top layer, or wear layer, is designed to resist scratches and stains, while the middle layer provides stability and support. The bottom layer adds cushioning and insulation.
One of the main reasons vinyl flooring has gained immense popularity over the years is its affordability. Compared to other flooring options like hardwood or ceramic tile, vinyl is significantly more budget-friendly without compromising on quality. This makes it an attractive choice for homeowners looking to update their floors without breaking the bank.
Another advantage of vinyl flooring is its durability. Vinyl can withstand heavy foot traffic, making it ideal for high-traffic areas such as kitchens and hallways. It’s also resistant to moisture, making it an excellent option for bathrooms and basements where water damage may be a concern.
In addition to being cost-effective and robust, vinyl comes in a wide variety of styles and designs. Whether you prefer the classic elegance of hardwood or the sleek look of marble, there’s a vinyl option available to suit your aesthetic preferences.
With all these benefits combined, it’s no wonder that vinyl flooring has become so popular among homeowners everywhere. Its affordability, durability, and versatility make it an excellent investment for any space in your home!
Types of Vinyl Flooring
When it comes to vinyl flooring, there are several types to choose from, each with its own unique characteristics and benefits. One popular option is sheet vinyl flooring.
This type of vinyl comes in large rolls that can be cut and customised to fit any space. It offers a seamless look, making it ideal for high-traffic areas like kitchens and bathrooms.
Another option is vinyl tile flooring, which mimics the look of ceramic or stone tiles but at a more affordable price point. Vinyl tiles come in various sizes and designs, allowing you to create your desired aesthetic. They are also easy to install and maintain.
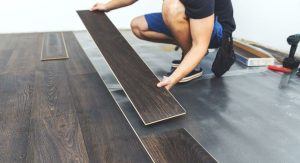
We have vinyl plank flooring, which replicates the appearance of hardwood floors. This type of vinyl is available in planks that resemble real wood grain patterns and textures. It provides warmth and elegance to any room while being more resistant to water damage compared to traditional cleaned wood floors.
No matter what type of vinyl flooring you choose, they all offer durability, affordability, and easy maintenance – making them perfect for busy households or commercial spaces. So go ahead and explore the different options available before deciding on the best one for your needs!
Tools and Supplies Needed for Cleaning Vinyl Floors

To effectively clean vinyl floors, you will need a few tools and supplies to get the job done right. Here is a list of what you’ll need:
- Broom or vacuum cleaner: Start by removing loose dirt and debris from the floor’s surface. Use a broom or vacuum cleaner with a soft brush attachment to avoid scratching the vinyl.
- Microfibre mop: A microfibre mop is ideal for cleaning vinyl floors as it is gentle yet effective at picking up dirt without leaving streaks behind.
- Mild detergent or vinegar solution: Avoid using harsh chemicals on your vinyl floors, as they can cause damage over time. Instead, opt for a mild detergent specifically formulated for vinyl flooring or create your own cleaning solution by mixing equal parts water and vinegar.
- Bucket: A bucket is essential for mixing your cleaning solution and dipping your mop into it.
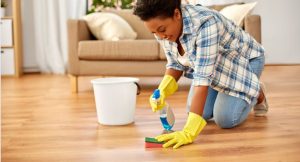
- Soft-bristle brush or sponge: For stubborn stains or grime, have a soft-bristle brush or sponge handy to gently scrub away any residue without damaging the vinyl.
- Clean towels or microfibre cloths: These are necessary for drying the floor after mopping to prevent any moisture from seeping into the material.
By having these tools and supplies on hand, you’ll be well-equipped to tackle any messes that come your way while maintaining the beauty of your vinyl floors!
Step-by-step Guide on How to Clean Vinyl Floor

Vinyl flooring is a popular choice for many homeowners due to its durability and easy maintenance. To keep your vinyl floor looking clean and vibrant, follow these simple steps:
Preparing the Floor
Before you start cleaning your vinyl floor, it’s essential to prepare the surface properly. This step ensures that you remove any loose dirt or debris before applying any cleaner. Here’s how to do it effectively.
First, sweep or vacuum the entire floor to get rid of dust, hair, and other loose particles. Use a soft-bristle broom or a vacuum with a brush attachment to avoid scratching the vinyl surface.
Next, use a damp mop or cloth to wipe down the floor with warm water and mild soap. Avoid using harsh chemicals as they can damage the vinyl.
If there are stubborn stains or scuff marks on your vinyl floor, try using an appropriate stain remover recommended by the manufacturer. Test it on a small hidden area first to ensure that it doesn’t cause discolouration or damage.
Once you’ve thoroughly cleaned and removed any stains from your vinyl floor, allow it to dry completely before moving on to the next step of mopping.
By taking these simple but important steps in preparing your vinyl floor for cleaning, you’ll be able to achieve better results and maintain its beauty for years to come!
Choosing the Right Cleaner
When it comes to cleaning your vinyl floor, choosing the right cleaner is essential. Using harsh chemicals or abrasive materials can damage the surface of your floor and diminish its shine. That’s why it’s important to opt for a cleaner that is specifically designed for vinyl flooring.
One option is to make your own homemade cleaner using simple ingredients like vinegar and water. This natural solution effectively removes dirt and grime without leaving behind any residue.
Another alternative is to purchase a commercial vinyl floor cleaner from a reputable brand. These cleaners are formulated with gentle yet effective ingredients that won’t harm your floors.
Before selecting a cleaner, always check the manufacturer’s recommendations for your specific type of vinyl flooring. Some types may require specialised cleaners or have certain restrictions on what products can be used.
Additionally, consider any specific concerns you may have, such as stains or odours. There are cleaners available that target these issues specifically, providing you with peace of mind knowing that your floor will be thoroughly cleaned.
Remember to always follow the instructions provided by the manufacturer or on the product label when applying any cleaner to your vinyl floor. Use a soft mop or cloth to apply and gently scrub away dirt and stains.
Mopping Technique

To effectively clean your vinyl floor, mastering the proper mopping technique is essential. Follow these mopping techniques for a thorough and efficient cleaning process.
First, start by sweeping or vacuuming the vinyl floor to remove any loose dirt and debris. This will prevent scratching during the mopping process. Once you’ve cleared away the larger particles, it’s time to grab your mop.
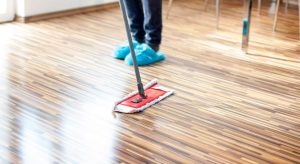
When choosing a mop, opt for one with a microfibre or sponge head. These materials are gentle on vinyl floors and won’t leave behind streaks or residue. Additionally, consider using a mop with an adjustable handle to make reaching those hard-to-reach areas easier.
Before wetting your mop head, thoroughly wring out any excess water or cleaning solution. You want your mop damp but not dripping wet, as excessive moisture can damage the vinyl flooring.
Next, starting at one end of the room, begin mopping in straight lines towards the opposite side. Avoid circular motions as they can spread dirt around rather than lifting it off the surface.
As you move across the floor, periodically rinse out your mop in clean water to ensure you’re not spreading dirt from one area to another. Also, keep an eye on any visible stains or spills and give them extra attention by applying gentle pressure while mopping.
Once you have covered all areas of the floor with your cleaning solution and rinsed away any residue with plain water, allow sufficient drying time before walking on it again.
Drying Methods
After thoroughly mopping your vinyl floor, it’s important to ensure that it dries properly. This step is crucial for preventing any water damage or potential slips and falls. Luckily, there are a few effective drying methods you can utilise to achieve a clean and dry vinyl floor.
One popular and efficient method is air drying. Simply allow the floor to air dry on its own after mopping. Open windows or turn on fans to promote better airflow in the room. This will help speed up the drying process and ensure that no moisture is left behind.
If you’re looking for a quicker option, you can also use a microfibre cloth or mop to manually dry the floor. Gently wipe down the surface, focusing on areas with excess moisture or puddles of water. The absorbent nature of microfibre materials helps in soaking up any remaining moisture without causing damage.
Another useful technique is using a wet/dry vacuum cleaner specifically designed for hard floors like vinyl. These vacuums have powerful suction capabilities that efficiently extract any leftover liquid from the surface, leaving your vinyl floor clean and dry in no time.
Remember, regardless of which method you choose, always make sure your vinyl floor is completely dry before walking or placing any furniture back on it. By following these simple yet effective drying methods, you can maintain your vinyl flooring’s beauty while ensuring its longevity.
Tips for Maintaining a Clean Vinyl Floor

Maintaining a clean vinyl floor is essential to keep it looking fresh and vibrant for years to come. Here are some tips to help you keep your vinyl floor in top shape without much effort.
- Regular Sweeping: One of the simplest ways to maintain a clean vinyl floor is by sweeping it regularly. This helps remove dust, dirt, and other debris that can scratch or damage the surface.
- Use Doormats: Placing doormats at entryways can prevent dirt and moisture from being tracked onto your vinyl floor. This will reduce the amount of cleaning required and protect your flooring from potential stains.
- Wipe Up Spills Immediately: Accidents happen, but it’s important to wipe up spills as soon as possible to avoid staining or damaging the vinyl. Use a damp cloth or mop for quick cleanup.
- Avoid Harsh Chemicals: When cleaning your vinyl floor, opt for mild cleaners specifically designed for this type of flooring. Harsh chemicals can strip away the protective layer and cause discolouration or damage over time.
- Protect with Furniture Pads: Place furniture pads under heavy objects like chairs and tables to prevent them from scratching or denting your vinyl floor when moved.
- Avoid High Heels: Walking on a vinyl floor with high heels can leave unsightly marks or even puncture the surface in extreme cases. Encourage guests (and yourself!) to remove shoes before walking on the floors.
- Clean Spots: Promptly Vinyl floors are prone to spots caused by various substances such as grease, ink, gum, etc. These need prompt attention using warm, soapy water
Remember that proper maintenance goes hand-in-hand with regular cleaning routines when it comes to preserving your beautiful vinyl flooring!
Conclusion
Maintaining a clean vinyl floor is essential to preserving its beauty and longevity. By following the proper cleaning techniques outlined in this how to clean vinyl floor article, you can keep your vinyl flooring looking fresh and vibrant for years to come.
From preparing the floor and choosing the right cleaner to mastering the mopping technique and using effective drying methods, we’ve covered all the tips and tricks you need to know. By following these simple steps, you can keep your vinyl floors sparkling clean without any hassle.
So, next time you’re faced with a dirty vinyl floor, remember to take your time, use gentle materials and cleaners, and follow these guidelines for a thorough and effective cleaning process. With a little effort and consistency, your vinyl floors will continue to be a shining star in your home or business!


