Welcome to our blog post on how to clean a toaster! We all love the convenience of a perfectly toasted slice of bread or a delicious bagel in the morning.
But have you ever stopped to think about what’s lurking inside your trusty toaster? Over time, crumbs and debris can accumulate, not only affecting the taste of your food but also posing a fire hazard.
That’s why it’s essential to give your toaster regular TLC by following our step-by-step guide on how to clean toaster effectively.
Trust us, once you see how easy it is, you’ll wonder why you haven’t done it sooner! So grab your cleaning supplies, and let’s get started on making your toaster sparkle again!
What is a Toaster?

A toaster is a small kitchen appliance designed to toast bread, bagels, or other types of baked goods. It typically consists of two slots where you place the items to be toasted and a heating element that applies heat directly to the food.
Toasters are available in various sizes and styles, from simple models with basic functions to more advanced ones with extra features like defrosting or reheating.
In today’s fast-paced world, a toaster has become an essential item in many households. Its ability to quickly and efficiently toast your favourite breakfast treats makes it a convenient addition to any kitchen. Whether you prefer lightly golden toast or crispy bagels, having a reliable toaster ensures that your morning routine runs smoothly.
Toasters come in different shapes and designs, but they all serve one primary purpose: creating perfectly toasted delights for you to enjoy.
So next time you reach for that warm slice of bread slathered with butter or topped with avocado, take a moment to appreciate the humble yet indispensable appliance responsible for making it oh-so-deliciously crispy!
Importance of Cleaning Your Toaster Regularly
Toasters are a staple in most kitchens, providing us with perfectly toasted bread and bagels to start our day. However, many of us overlook the importance of cleaning our toasters regularly. Neglecting this simple task can lead to a buildup of crumbs, debris, and even potential fire hazards.
Regular cleaning ensures that your toaster functions properly and efficiently. Over time, crumbs can accumulate in the bottom tray or around the heating elements. This not only affects the quality of your toast but also poses a risk of burning or smoking if left unattended.
Keeping your toaster clean helps maintain its longevity. By removing any food particles or residue from the interior and exterior surfaces, you prevent corrosion and prolong its lifespan.
Maintaining a clean toaster promotes good hygiene in your kitchen. The accumulation of crumbs can attract pests like ants or mice seeking food sources. Regular cleaning eliminates these risks and keeps your kitchen clean and pest-free.
Taking just a few minutes every week to clean your toaster will ensure it stays in optimal condition while reducing potential safety hazards. Don’t overlook this simple yet essential task!
Step-by-step Guide on How to Clean Toaster
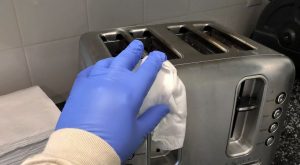
Cleaning your toaster may not be the most exciting task on your to-do list, but it is essential for keeping your appliance in good working order. Follow this step-by-step guide to make the process quick and easy.
Safety Precautions
When it comes to cleaning your toaster, safety should always be a top priority. Here are some important precautions to keep in mind before you begin the cleaning process.
First and foremost, make sure that your toaster is unplugged from the power source. This will prevent any accidental electrical shocks while you’re handling the appliance. Additionally, allow the toaster to cool down completely before starting the cleaning process. The heating elements can retain heat for quite some time after use, so it’s best to give it ample time to cool off.
Another safety measure is to never immerse your toaster in water or any other liquid. Toasters are electrical appliances, and exposing them to moisture can lead to serious damage or even electric shock hazards. Instead, use a damp cloth or sponge with a mild soap solution to clean the exterior of the toaster.
Avoid using sharp objects such as knives or forks inside the slots of your toaster when removing crumbs or stuck debris. These metal objects can cause damage to both yourself and the internal components of the appliance. Opt for non-metallic tools like wooden skewers or brushes specifically designed for this purpose.
By following these safety precautions, you can ensure a safe and effective cleaning experience for your beloved toaster without any mishaps along the way!
Removing Crumbs and Debris
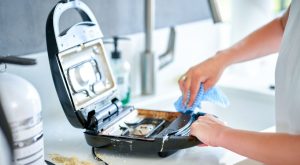
To ensure your toaster functions properly and produces deliciously toasted bread, it’s essential to remove any crumbs and debris that may have accumulated inside. This step is crucial as leftover crumbs can not only affect the taste of your toast but also lead to a potential fire hazard.
Start by unplugging the toaster and placing it over a sink or rubbish bin to catch any falling debris. Gently shake the toaster upside down, tapping on the sides if necessary, to dislodge any loose crumbs. Use a soft brush or toothbrush to carefully sweep away stubborn residue from hard-to-reach corners.
For more thorough cleaning, you can remove the crumb tray located at the bottom of most toasters. Empty its contents into the rubbish and wash it with warm, soapy water before drying thoroughly. Remember to wipe down both sides of the tray before reinserting it back into place.
By regularly removing crumbs and debris from your toaster, you’ll not only maintain better hygiene standards but also prolong its lifespan for many perfectly toasted mornings ahead!
Cleaning the Exterior and Interior of the Toaster
To ensure your toaster remains in top-notch condition, it’s essential to clean both the exterior and interior regularly. Let’s start with the exterior. Begin by unplugging the toaster and wiping down the surface with a damp cloth or sponge. For stubborn stains or grease, you can use a mild dish soap solution. Be sure to dry thoroughly before plugging it back in.
Moving on to the interior, first, remove any remaining crumbs or debris from the crumb tray located at the bottom of your toaster. Dispose of them properly and give the tray a good wash with warm, soapy water before drying it completely.
Next, using a soft brush or toothbrush, gently scrub inside the slots where the bread is placed for toasting. Avoid getting any liquid into these areas, as it may damage your appliance.
Pay attention to cleaning around knobs and buttons, as they can accumulate grime over time. Use a cotton swab dipped in rubbing alcohol for hard-to-reach spots if needed. Remember never to submerge your toaster in water or use abrasive cleaners that could scratch its surfaces.
Cleaning the Heating Elements or Coils

The final step in giving your toaster a thorough cleaning is to clean the heating elements or coils. Over time, these components can become covered with burnt food particles and grease, which can affect the toaster’s performance and even pose a fire hazard if left unattended.
To clean the heating elements or coils, start by unplugging your toaster and allowing it to cool down completely. Gently turn your toaster upside down over a sink or rubbish bin to remove any loose crumbs or debris that may have accumulated on top of the elements.
Next, take a soft, damp cloth and wipe down the heating elements or coils carefully. Avoid using abrasive cleaners or scrubbing too vigorously, as this could damage them. If there are stubborn stains that won’t come off with just water, you can use a mild dish soap solution to gently remove them.
Once you’ve finished cleaning the heating elements or coils, make sure they are completely dry before reassembling your toaster and plugging it back in. To prevent any electrical hazards, it’s crucial not to use your toaster until all parts are fully dried.
Reassembling the Toaster
Now that you’ve successfully cleaned the interior, exterior, and heating elements of your toaster, it’s time to put everything back together. Reassembling the toaster may seem like a daunting task, but with these simple steps, you’ll have it up and running in no time!
Gather all the removable parts that were taken out during the cleaning process. This usually includes the crumb tray and any other detachable components. Make sure they are clean and dry before proceeding.
Next, carefully align each part with its corresponding slot or attachment point within the toaster. Take your time to ensure that everything fits snugly into place without any resistance or misalignment.
Once everything is properly reassembled, give your toaster one final wipe-down to remove any fingerprints or smudges that may have occurred during handling. Now, you can plug it back in and enjoy perfectly toasted bread once again!
Tips for Maintaining a Clean Toaster

Maintaining a clean toaster is not only important for hygiene purposes, but it also helps to extend the lifespan of your appliance. Here are some simple tips to help you keep your toaster in tip-top shape.
Always unplug the toaster before cleaning it. This will prevent any accidents or electrical shocks. Make sure to remove and empty the crumb tray at the bottom of the toaster regularly. Crumbs can accumulate over time and cause a fire hazard if left unchecked.
Next, wipe down the exterior of the toaster with a damp cloth. Avoid using harsh chemicals as they may damage the surface. For stubborn stains or grease marks, you can use a mild dish soap solution.
Remember to clean inside the slots where the bread goes, as well as any heating elements or coils, carefully. Use a soft brush or toothbrush to gently remove any debris while being cautious not to damage these delicate parts.
By following these tips on maintaining a clean toaster, you’ll not only ensure its longevity but also enjoy delicious toast every morning without worrying about crumbs or dirt affecting its performance!
Conclusion
Keeping your toaster clean is essential for maintaining its performance and prolonging its lifespan. By following the step-by-step guide on how to clean toaster, you can easily remove crumbs, debris, and grease from both the exterior and interior of your appliance.
Remember to always prioritise safety by unplugging the toaster before cleaning and allowing it to cool down completely. And don’t let those crumbs and debris pile up any longer – grab your cleaning supplies and give your trusty toaster the TLC it deserves!


