Tile grout is notorious for becoming dirty and discolored over time, especially in high traffic areas like kitchens and bathrooms. But fear not! With the right cleaning techniques, you can restore your tile grout to its former glory and make it look new. This step-by-step guide will walk you through how to clean tile grout effectively. We’ve got you covered from applying a grout cleaner to tackling stubborn stains. Get ready to say goodbye to unsightly grime and hello to sparkling clean tile grout!
Recommended Cleaning Products

- Hot Water Spray
- Baking soda and vinegar
- Vinegar and Water
- Hydrogen Peroxide
- Routine cleaning and maintenance
Step-by-Step Cleaning Process on How to Clean Tile Grout
1. Apply Grout Cleaner
- Start by choosing a high-quality grout cleaner designed for your type of tiles. Read the advices on the bottle carefully before consuming it.
- Next, pour a small amount onto the surface of the grout lines and let it sit for a few minutes to allow it to penetrate and loosen any stubborn buildup.
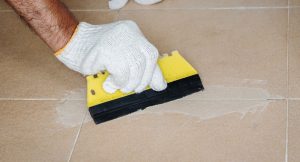
- Use a brush with stiff bristles or an old toothbrush to scrub along the grout lines in circular motions. This will help agitate and lift away any dirt or discoloration present.
- After scrubbing thoroughly, rinse the excess cleaner with clean water or wipe away with a damp cloth until no residue remains on the tiles or within the grout lines.
- Be sure to dry off any excess moisture from the tiles and grout afterward using a clean towel or microfiber cloth.
2. Scrub and Rinse Grout

After applying the grout cleaner, it’s time to scrub and rinse the grout. This step is crucial in removing dirt, stains, and buildup from the surface of the grout lines.
Scrub the grout lines in a back-and-forth motion using a stiff-bristled or old toothbrush. Apply moderate pressure to ensure effective cleaning without damaging the tile. Any locations with discolouration or persistent stains should receive further care.
Once you’ve thoroughly scrubbed all the grout lines, it’s time to rinse off the cleaner. Use clean water and a sponge or cloth to remove any excess cleaner from the tiles and grout. Make sure to remove all traces of residue for a sparkling finish.
Scrubbing and rinsing may require some elbow grease, but it’s worth it for that fresh-looking grout! Remember to take your time and be thorough in this step for optimal results.
3. Clean Stubborn Stains

Stubborn stains on tile grout can be quite frustrating to deal with. But worry not—there are practical solutions for handling them! One method is using a paste made of baking soda and hydrogen peroxide. Mix the two ingredients until you have a thick consistency, then apply it onto the stained grout. Let it sit for about 15 minutes before scrubbing with a brush or toothbrush. Rinse thoroughly afterwards.
Another option is to use vinegar, known for its natural cleaning properties. Mix equal parts white vinegar and water in a spray bottle and spritz it onto the stained grout. Allow it to sit for 10-15 minutes before scrubbing with a brush or toothbrush. Rinse well with water afterward to remove any residue.
4. Prevent Buildup on Grout
You can take a few simple steps to ensure your tile grout remains clean and buildup-free. First, it’s important to regularly maintain your grout by wiping it down with a damp cloth or sponge after each use. This will help prevent dirt or debris from settling into the grout lines.
In addition, using a mildew-resistant caulk around areas prone to moisture, such as showers and sinks, can also help prevent buildup. This will create a barrier against moisture and make it easier to keep clean. These preventive measures can significantly reduce the chances of stubborn stains and buildup on your tile grout!
5. DIY Grout Cleaner
Cleaning tile grout doesn’t have to be daunting, especially when you can make your DIY grout cleaner! Using simple ingredients in your pantry, you can effectively clean and brighten your grout lines.
One popular DIY grout cleaner recipe involves mixing equal parts baking soda and hydrogen peroxide. Start by combining the two ingredients in a small bowl until it forms a paste-like consistency. Then, apply the mixture onto the dirty grout lines with an old toothbrush or scrub brush. Gently scrub the paste into the grout using circular motions, focusing on any stubborn stains or discoloration. Let it sit for about 10 minutes to allow the cleaning agents to work their magic.
Conclusion
Keeping your tile grout clean is essential for maintaining the appearance and longevity of your tiled surfaces. These step-by-step cleaning processes will help you how to clean tile grout by removing dirt, stains, and buildup from your grout lines.
Start by applying a suitable grout cleaner to the affected areas. Allow it to penetrate the grout for a few minutes before scrubbing with a brush or sponge. Rinse thoroughly with water to remove any residue.
For stubborn stains that don’t easily come off with regular cleaning methods, try using specialized stain removers or create a paste using baking soda and hydrogen peroxide. Apply this mixture to the stained area and let it sit for some time before scrubbing away.
Suppose you prefer natural alternatives or want to save money on commercial cleaners. In that case, you can make your DIY grout cleaner using ingredients like vinegar, baking soda, lemon juice or hydrogen peroxide. These homemade solutions effectively break down dirt and stains without harsh chemicals.
Remember that proper maintenance is key to keeping tile grouts clean. Regular cleaning will enhance the appearance of your tiled surfaces and prolong their lifespan by preventing discoloration and deterioration of the grout itself.
So roll up those sleeves, gather your supplies, and start tackling that dirty tile grout today! With these tips, you’ll have sparkling clean floors in no time!