Are you tired of spending a fortune on paint rollers only to toss them out after just one use? Look no further! In this blog post, we will reveal the ultimate secret to extending the lifespan of your trusty paint rollers – proper cleaning techniques. Say goodbye to wastage and hello to savings as we dive into the step-by-step process of How to Clean Paint Rollers.
Whether you’re a seasoned DIY enthusiast or a first-time painter, this guide is guaranteed to revolutionize how you tackle those pesky post-painting clean-ups. So grab your brushes, and let’s get rolling towards cleaner, greener painting practices together!
The Importance of Cleaning Paint Rollers
Cleaning paint rollers is a crucial step that should never be overlooked. Why, you ask? Well, for starters, cleaning your paint rollers ensures that any leftover paint or debris is removed. This not only prevents cross-contamination of colours but also guarantees a smooth and even application of paint on your next project.
Additionally, properly cleaned and maintained paint rollers last longer. By keeping them free from dried-up or hardened paint, you can ensure they remain in excellent condition and continue to deliver top-notch results. So remember, taking the time to clean your paint rollers is an investment in both the quality of your work and the longevity of your painting tools.
Why Are Cleaning Paint Rollers Different from Other Painting Tools?
When it comes to painting, many people overlook the importance of cleaning their paint rollers. However, cleaning paint rollers is different from cleaning other painting tools for several reasons.
Paint rollers have a unique construction that makes them more difficult to clean compared to paint brushes or sprayers. The roller sleeve is made up of absorbent fibres that can trap and hold onto excess paint. This means that simply rinsing the roller under water may not be enough to remove all the paint residue.
Because of their design, paint rollers require thorough cleaning in order to maintain their performance and longevity. If not properly cleaned, dried bits of paint can harden on the roller’s surface and affect its ability to distribute an even coat of paint during future use.
Cleaning your paint rollers is crucial for maintaining their effectiveness over time and ensuring a smooth painting experience. Taking extra care when cleaning these tools will help prolong their lifespan and save you money in the long run.
Materials Needed for Cleaning Paint Rollers
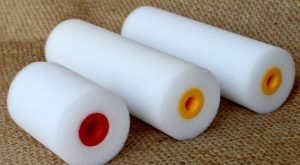
When it comes to cleaning paint rollers, having the right materials on hand can make the process much easier and more effective. Here are a few essential items you’ll need to get started.
You’ll want to have access to a sturdy bucket or container that is large enough to hold your paint roller comfortably. This will be used for soaking and rinsing the roller during the cleaning process. Additionally, you’ll need some clean rags or paper towels for wiping away excess paint and drying off the roller after cleaning.
Next, gather some dish soap or a mild detergent that is safe for use on fabrics. This will help break down any remaining paint residue on the roller. If you prefer a more natural option, white vinegar can also be used as an effective cleaner. Keep some warm water handy for mixing with your chosen cleaning agent.
By having these materials prepared in advance, you’ll be well-equipped to tackle even the toughest paint roller cleaning tasks with ease!
Step-by-Step Guide on How to Clean Paint Rollers

Cleaning paint rollers may seem like a daunting task, but with the right method and materials, it can be an easy and effective process. Here is a step-by-step guide to help you clean your paint rollers efficiently.
Pre-cleaning Steps: Removing Excess Paint and Choosing the Right Cleaning Method
When it comes to cleaning paint rollers, the first step is to remove any excess paint before diving into the actual cleaning process. This pre-cleaning step is crucial as it helps make the subsequent cleaning much more effective.
To begin, scrape off any excess paint from the roller using a putty knife or similar tool. Gently press down on the roller and move the knife across its surface to remove as much of the leftover paint as possible. You can also use your hands to squeeze out any excess paint if needed.
Once you’ve removed most of the excess paint, it’s time to choose the right cleaning method for your specific type of roller and type of paint used. Different paints may require different methods, so consider factors such as water-based or oil-based paints when making your decision.
Cleaning Methods
There are various cleaning methods you can use to effectively clean your paint rollers. Each method has its own advantages and may work better for different types of paints or situations. Here are some common cleaning methods:
Soap and Water Method
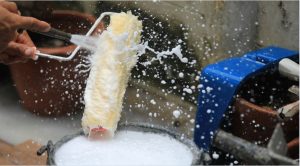
For those looking for a simple and affordable method to clean paint rollers, the soap and water method is a go-to option. This tried-and-true technique requires minimal materials and can easily be done at home.
To start:
- Gather a bucket or sink filled with warm water and add a few drops of dish soap
- Swirl the water around to create suds
- Take your paint roller and submerge it in the soapy water, making sure it is fully saturated
- Gently squeeze the roller to release any excess paint trapped within its fibres
- Once you’ve removed as much paint as possible, use your hands or a scrub brush to gently agitate the roller under running water until all traces of paint are gone.
Remember to rinse thoroughly to ensure there is no soap residue left on the roller. Pat dry with paper towels or allow it to air dry completely before storing it away for future use. The soap and water method may require some elbow grease but provides an effective way of cleaning your paint rollers without breaking the bank!
Mineral Spirits Method
The Mineral Spirits Method is another effective way to clean paint rollers. This method involves using a solvent called mineral spirits, which helps break down and remove the dried paint from the roller.
To begin, gather your materials: mineral spirits, a container large enough to hold the roller, and gloves for protection. Start by pouring enough mineral spirits into the container to submerge the roller fully. Then, place the roller in the container and gently agitate it back and forth for a few minutes. This will help loosen any remaining paint on the roller.
Once you’ve agitated the roller thoroughly, remove it from the container and rinse it with warm water. If there is still some stubborn paint left on the roller, repeat this process until it comes out clean. After rinsing, squeeze out any excess water from the roller and allow it to air dry completely before storing or reusing it again in your next painting project.
Vinegar Method
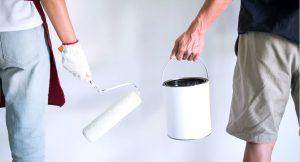
One of the most widely used and effective methods for cleaning paint rollers is the vinegar method. Vinegar, with its acidic properties, works wonders in breaking down and removing dried paint from your roller. It’s also a natural and non-toxic alternative to harsh chemical cleaners.
To clean your paint roller using the vinegar method:
- Start by filling a container or bucket with enough white vinegar to submerge the roller fully
- Place the roller in the vinegar solution and let it soak for at least 2 hours or overnight for stubborn stains
- After soaking, use a scrub brush or old toothbrush to gently remove any remaining paint residue from the roller
- Rinse thoroughly with water until all traces of vinegar are gone
Using this simple yet effective vinegar method will help extend the lifespan of your paint rollers while keeping them clean and ready for your next painting project!
Fabric Softener Method
The Fabric Softener Method is a popular and effective way to clean paint rollers. It offers a gentle yet thorough cleaning process that leaves your roller looking like new.
To start:
- Mix equal parts of fabric softener and warm water in a bucket or sink
- Submerge the paint roller into the mixture, making sure it’s completely soaked
- Let it sit for about 10 minutes to allow the fabric softener to break down any dried paint particles
After soaking, use your hands or a scrub brush to gently agitate the roller, loosening any remaining paint. Rinse thoroughly with clean water until all traces of paint and fabric softener are gone.
This method not only cleans but also conditions the roller fibres, ensuring they stay soft and pliable for future use. Remember to always follow manufacturer instructions when using fabric softeners on your paint tools.
Keep reading to learn how you can properly dry and store your cleaned paint rollers!
Drying and Storing Your Clean Paint Roller
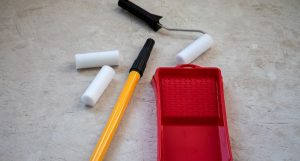
Once you’ve successfully cleaned your paint roller, the next step is to ensure it dries properly before storing it. This will help prevent any mould or mildew from forming on the roller.
To dry your clean paint roller, start by gently squeezing out any excess water or cleaning solution. Then, lay the roller flat on a clean surface, such as a towel or piece of cardboard. Allow it to air dry completely before moving on to the next step.
When storing your dried paint roller, make sure it is fully dry and free from any moisture. Moisture can lead to mould growth and ruin your roller for future use. Store the roller in a cool, dry place away from direct sunlight and extreme temperatures.
Conclusion
Keeping your paint rollers clean is an essential part of maintaining their quality and prolonging their lifespan. By following the simple steps in this article on How to Clean Paint Rollers, you can effectively remove excess paint and maintain the integrity of your rollers.
Whether you are a professional painter or simply doing some DIY projects, taking care of your tools will save you time and money in the long run. So keep these tips in mind the next time you need to clean your paint rollers for a smooth and efficient painting experience. Your beautifully painted walls will thank you!


