Are you an avid painter, or maybe just a casual DIY enthusiast? Either way, if you’ve ever worked with paint brushes, then you know how important it is to keep them clean and in good condition. Not only does proper cleaning extend the lifespan of your brushes, but it also ensures that they perform at their best every time you need them. So whether you’re a professional artist or simply tackling a home improvement project, learning how to clean paint brushes is key!
In this comprehensive guide, we’ll walk you through everything from selecting the right tools and materials to step-by-step instructions on different cleaning methods. Say goodbye to dried-up bristles and hello to pristine brushes, ready for your next masterpiece! Let’s get started on giving those trusty tools some well-deserved TLC.
Why Cleaning Your Paint Brushes is Important?

Maintaining clean paint brushes is more than just a matter of hygiene. It’s crucial for the longevity and performance of your beloved tools. When paint residue is left to dry on the bristles, it can harden and ruin their shape, making them less effective during application. By regularly cleaning your brushes, you ensure that they remain soft and pliable, allowing for smooth strokes and precise control.
Not only does proper brush cleaning improve their functionality, but it also prevents cross-contamination between different colours or types of paint. Imagine trying to create a vibrant blue sky with traces of orange from a previous project!
Keeping your brushes clean avoids unwanted colour mixing and ensures true pigment representation. Plus, by caring for your brushes properly, you’ll save money in the long run, as they will last longer and maintain their quality over time.
Tools and Materials Needed for Cleaning Paint Brushes
When it comes to cleaning paint brushes, having the right tools and materials on hand is essential. Here are a few items you’ll need to effectively clean your brushes.
You’ll need a bucket or container large enough to hold your brushes and cleaning solution. This will be used for soaking and rinsing the brushes. Additionally, you’ll want to have access to running water for thorough rinsing.
Next, gather some mild soap or dishwashing detergent. This will be used in combination with water for cleaning water-based paints from your brushes. For oil-based paints, you may need mineral spirits or turpentine as a solvent instead of soap. Don’t forget about paper towels or rags for drying off excess moisture after cleaning.
By having these tools and materials ready before starting the cleaning process, you can ensure that your paintbrushes will be properly cleaned and ready for future use!
Step-by-Step Guide on How to Clean Paint Brushes

In this step-by-step guide on how to clean paint brushes, you’ve learned the importance of proper brush maintenance and the tools and materials needed for cleaning. By following these simple steps, you can ensure that your paint brushes stay in excellent condition and are ready for your next project.
Pre-cleaning Steps
Before diving into the actual cleaning process, there are a few pre-cleaning steps that you should take to ensure the best results. First and foremost, gather all the necessary tools and materials for cleaning your paint brushes. This includes a clean container or bucket, mild soap or detergent, vinegar or fabric softener solution (if needed), mineral spirits or turpentine (for oil-based paints), and some old rags or paper towels.
Next, remove as much excess paint from your brush as possible by gently scraping it against the edge of your paint can or palette. Be careful not to damage the bristles in the process. Once you’ve removed most of the paint, rinse your brush under running water to get rid of any remaining residue.
By following these simple pre-cleaning steps, you’ll be setting yourself up for success when it comes time to actually clean your paint brushes. So don’t skip this important preparation phase – it will make a world of difference!
Removing Excess Paint
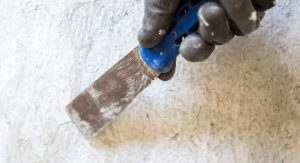
When it comes to cleaning paint brushes, the first step is to remove any excess paint. This not only helps in preserving the brush bristles but also makes the cleaning process much easier.
To remove excess paint, start by gently tapping the brush against the inside of a clean container or on a piece of newspaper. This will help loosen and dislodge any remaining paint from the bristles. Then, using a cloth or paper towel, wipe off any excess paint from both sides of the brush. Be sure to do this carefully and thoroughly so that no traces of paint are left behind.
By taking these simple steps to remove excess paint before cleaning your brushes, you’ll ensure better results and prolong their lifespan. So remember, always start by getting rid of that extra paint!
Choosing the Right Cleaning Method Based on Paint Type
Different types of paint require different cleaning methods to ensure that your brushes stay in top condition. When it comes to water-based paints like acrylic or latex, you can simply clean your brushes with soap and warm water. This gentle method effectively removes the paint without damaging the bristles.
For oil-based paints, however, a stronger solvent is needed for thorough cleaning. Mineral spirits or turpentine can be used to break down and remove oil-based paint from your brushes. Be sure to work in a well-ventilated area when using these solvents, and follow all safety precautions.
In addition to using the appropriate cleaning method for the type of paint, it’s also important to consider the quality of the paint. Higher quality paints tend to have better pigmentation and can be more difficult to remove from brushes. In this case, it may be necessary to use a specialized brush cleaner or conditioner to help break down and remove the paint.
Overall, it’s recommended to clean your brushes immediately after use while the paint is still wet. This will make it easier to remove and prevent any buildup or damage to the bristles. Properly caring for your brushes will not only preserve their lifespan but also ensure that you have high-quality tools for future painting projects.
Cleaning With Soap and Water
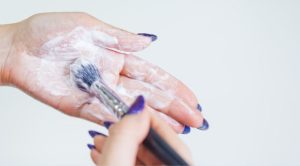
Cleaning With Soap and Water is one of the most common methods to clean paint brushes. It is a simple yet effective way to remove water-based paints from your brushes.
To start, rinse the brush under warm running water to remove any excess paint. Then, fill a container with warm water and add a few drops of mild dish soap. Swirl the brush in the soapy water, making sure to work it into the bristles. Use your fingers or a brush cleaning tool to gently scrub away any remaining paint.
Once you’re satisfied that the brush is clean, rinse it thoroughly under running water until all traces of soap are gone. Gently pat dry with a towel or paper towels and reshape the bristles if necessary. Leave the brush horizontally on a flat surface or hang it upside down to air dry completely before storing it for future use.
Cleaning With Vinegar or Fabric Softener Solution
When it comes to cleaning paint brushes, there are various methods you can choose from. One effective and budget-friendly option is using vinegar or a fabric softener solution. These household items are readily available and can help restore your brushes to their original condition.
To begin, mix equal parts of warm water and vinegar in a container. If you prefer the fabric softener solution, dilute it with water according to the manufacturer’s instructions. Submerge the paintbrushes into the mixture and let them soak for about 30 minutes.
After soaking, use your fingers or a brush comb to gently remove any remaining paint residue from the bristles. Rinse thoroughly under running water until all traces of vinegar or fabric softener have been removed.
By utilizing these simple solutions, you can effectively clean your paint brushes without spending extra money on specialized cleaners. Give it a try and see how easy it is to maintain your brushes in top-notch condition!
Cleaning Oil-based Paints With Mineral Spirits or Turpentine

When it comes to oil-based paints, a different approach is needed for cleaning your brushes. These types of paints require stronger solvents like mineral spirits or turpentine to remove the excess paint effectively.
To begin, you’ll want to prepare a well-ventilated area as these solvents can have strong fumes. First, dip your brush into a container filled with the solvent and swirl it around to help break down the paint particles. You may need to repeat this step multiple times depending on how much paint is left in the brush.
Afterwards, use a clean cloth or paper towel to wipe off any remaining paint residue from the bristles. Wash your brush thoroughly with soap and water to remove any leftover solvent before drying and storing it properly.
Drying and Storing Your Paint Brushes
After you’ve properly cleaned your paint brushes, it’s crucial to ensure they are thoroughly dried before storing them. This helps prevent the growth of mould or mildew on the bristles and maintains their shape for future use.
To dry your paint brushes, gently shake off any excess water or cleaning solution. Then, lay them flat on a clean towel or hang them upside down using clips attached to a drying rack. Make sure the bristles are not touching any surface to avoid distortion.
Once completely dry, store your paint brushes in a cool and dry place, away from direct sunlight. You can protect the bristles by using brush guards or wrapping them in paper towels before putting them back into their protective cases or containers.
By following these simple steps for drying and storing your paint brushes, you can prolong their lifespan and ensure they’re ready for use whenever inspiration strikes!
Common Mistakes to Avoid When Cleaning Paint Brushes

Cleaning paintbrushes may seem like a simple task, but there are some common mistakes that people often make. One of the most common mistakes is leaving paint brushes to dry without cleaning them properly. This can result in hardened bristles that are difficult to clean later on.
Another mistake is using hot water when cleaning oil-based paints. Hot water can actually cause the paint to set and become even more difficult to remove from the brush. It’s important to use lukewarm or cool water instead.
Additionally, many people forget to thoroughly rinse their brushes after cleaning them with soap or other cleaning solutions. Residual soap or cleaner left on the bristles can affect future paint application and lead to streaks or uneven coverage.
To avoid these mistakes, it’s crucial to clean your paint brushes immediately after use and take care not to let them dry out before cleaning. Use water at an appropriate temperature for the type of paint you’re working with, and always remember to rinse your brushes thoroughly until no residue remains.
By avoiding these common mistakes, you’ll be able to keep your paint brushes in good condition for longer periods of time and ensure optimal performance whenever you need them again!
Conclusion
Keeping your paint brushes clean is not only important for maintaining their quality and longevity, but it also ensures the best results in all your painting projects. By following the step-by-step guide outlined in this article on how to clean paint brushes, you can easily clean your paint brushes and keep them in excellent condition.
Remember to always remove excess paint before cleaning, use the appropriate cleaning method for the type of paint, and properly dry and store your brushes after cleaning. By avoiding common mistakes, you’ll be able to extend the lifespan of your brushes and save money in the long run.
So, next time you finish a painting project, don’t forget to give your trusty brushes some well-deserved TLC. With these tips and techniques, you’ll have clean and pristine brushes ready to help you create your next masterpiece!