If you own a MacBook, you know how important it is to keep your keyboard clean. Over time, dirt, dust, and debris can accumulate between the keys, affecting their performance and overall hygiene. But fear not! With our step-by-step guide, you’ll learn the best practices for cleaning your MacBook keyboard and ensuring it stays in pristine condition.
Before we dive into the cleaning process, it’s essential to turn off your MacBook and unplug it from the power source. This ensures your safety as you work on cleaning the keyboard.
How to Clean Macbook Keyboard?
To begin, gently shake your MacBook over a trashcan. This will help dislodge any loose debris, such as dirt, dust, or food crumbs, that may have accumulated beneath the keys. Tap all the keys repeatedly before shaking to further remove debris. It may be surprising how much can collect in between those keys!
Next, it’s time to use a can of compressed air for a deep clean. Hold your MacBook at a 75-degree angle and spray the compressed air into the keyboard. Move from left to right, covering the entire length of the keyboard. Maintaining a half-inch distance between the straw and the keyboard prevents any accidental damage. Be sure to rotate the laptop and repeat the process to reach all pockets beneath the keys.
After using compressed air, it’s time to wipe down the surface of your MacBook keyboard. Use a lint-free cloth to dust the keys carefully. Avoid abrasive cloths or paper towels that could scratch the surface. For stubborn stains or spills, disinfectant wipes or a damp cloth with gentle pressure can be used. Remember not to spray any liquid directly onto the keyboard; instead, apply it to the cloth and then wipe.
If your MacBook keyboard requires intensive cleaning or if certain keys are sticky, you may consider removing the keycaps. This step is optional and should only be done if you feel comfortable with disassembling your keyboard. Take pictures before removing the keys for proper reassembly and use a damp cloth or cotton swab to clean the keycaps and the area beneath them. After cleaning, align the keycaps with the hooks and press them back into place.
Regularly cleaning your MacBook keyboard is essential. It helps maintain its performance, appearance, and hygiene. By following our step-by-step guide, you can ensure that your MacBook keyboard stays clean and free of debris. Don’t forget to clean your MacBook screen too, using suitable cleaning methods to keep your entire device in pristine condition.
Shake Off Loose Debris
To effectively clean your Macbook keyboard, it is essential to start by removing any loose debris. Begin by turning off your Macbook and gently shaking it over a trashcan. This simple step helps dislodge dirt, dust, or food crumbs that may have accumulated beneath the keys. To further ensure that debris is loosened, tap all the keys on the keyboard repeatedly before shaking it again.
While the amount of debris falling out may not be significant, it is crucial to prepare the keyboard for thorough cleaning. Removing loose particles sets the stage for a more effective cleaning process and helps maintain the keyboard’s performance.
Remember to exercise caution when shaking your Macbook, ensuring it is turned off and unplugged from the power source to prevent any accidents. Taking this precaution will help keep your device safe during the cleaning process.
Pro Tip: Consider using a can of compressed air to dislodge stubborn debris that may be trapped between the keys.

“Removing loose debris is a vital step in maintaining the cleanliness and functionality of your Macbook keyboard. By gently shaking off dirt and dust, you prepare the keyboard for a thorough and effective cleaning process.”
Use Compressed Air for Deep Cleaning
After shaking off the loose debris, it’s time to use a can of compressed air to achieve a deep clean. Hold your Macbook at a 75-degree angle and spray the compressed air into the keyboard. Move the compressed air from left to right, making sure to cover the entire length of the keyboard. It is important to maintain a half-inch distance between the straw of the compressed air can and the keyboard to prevent any damage.
Rotate the laptop and repeat the process to ensure all pockets beneath the keys are reached. This step is especially effective for removing dirt, dust, and debris from the keyboard.

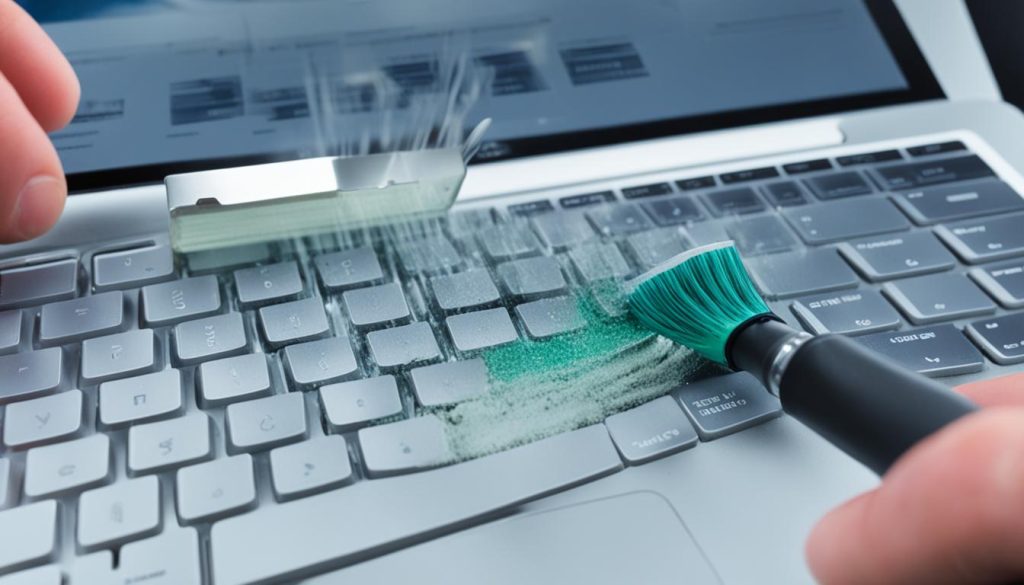
This image illustrates the use of compressed air for effective cleaning.
Wipe Down the Surface
Once you have used compressed air to remove debris, it’s time to wipe down the surface of your Macbook keyboard. Use a lint-free cloth to carefully dust the keyboard. Avoid using abrasive cloths or paper towels that may scratch the surface of the keys. For stubborn stains or spills, you can use disinfectant wipes or a damp cloth with gentle pressure. Make sure to avoid spraying any liquid directly onto the keyboard, as this can cause damage. Instead, apply the liquid to the cloth and then wipe down the keyboard. This step will ensure a thorough cleaning and remove any remaining dirt or grime.
Remove Keycaps for Intensive Cleaning (optional)
If your Macbook keyboard requires intensive cleaning or if you notice certain keys are sticky, you can consider removing the keycaps. Keep in mind that this step is optional and should only be done if you feel comfortable with disassembling your keyboard.
Begin by carefully removing the small, medium-sized, and large keys using a flathead screwdriver or a thin piece of plastic. Take pictures before removing the keys to ensure proper reassembly. This will make it easier to put them back in the correct positions later on.
Once the keycaps are removed, you can proceed to clean them and the area beneath them. Use a damp cloth or cotton swab to gently wipe the keycaps, removing any dirt, dust, or residue that may have accumulated. Be careful not to apply excessive pressure or use any harsh chemicals that could damage the delicate components.
For a more thorough cleaning, you can soak the keycaps in warm, soapy water for a few minutes before wiping them down. Just make sure to dry them completely before reattaching them.
When you’re ready to put the keycaps back, align them with the hooks on the keyboard and press them firmly until they snap into place. Take your time to ensure each key is securely attached.

If you’re unsure about removing the keycaps or if your keyboard is under warranty, it’s best to consult with a professional or contact the manufacturer for assistance. They can provide guidance specific to your device and ensure that your warranty remains valid.
Conclusion
Regularly cleaning your MacBook Pro keyboard is essential to maintain its performance, appearance, and hygiene. By following the step-by-step guide outlined in this article, you can ensure that your MacBook Pro keyboard remains clean and free of debris. Remember to turn off your laptop before cleaning to avoid any accidents and always use the appropriate cleaning methods.
Start by using compressed air to dislodge dirt and dust from the keyboard. This will help remove particles that are difficult to reach with a cloth. Then, wipe down the surface of the keyboard using a lint-free cloth or disinfectant wipes to remove any stains and germs. If your keyboard requires intensive cleaning, you can consider removing the keycaps, but be cautious and gentle to avoid damaging any components.
Moreover, don’t forget to clean your MacBook screen using suitable cleaning methods to keep it in pristine condition. Use a soft, microfiber cloth and screen-cleaning solution specifically designed for electronic devices. Gently wipe the screen in a circular motion to remove smudges and fingerprints. Avoid using harsh chemicals or abrasive materials that can damage the screen.
By regularly cleaning both the MacBook Pro keyboard and screen, you can ensure a pleasant and efficient user experience while prolonging the lifespan of your device. Take the time to maintain your MacBook Pro, and it will continue to serve you well for years to come.
FAQ
How do I clean my Macbook keyboard?
To clean your Macbook keyboard effectively, follow these step-by-step instructions. Start by turning off your Macbook and unplugging it from the power source to ensure safety. Shake the laptop gently over a trashcan to remove any loose debris. Then, spray a can of compressed air into the keyboard to dislodge dirt and dust. Rotate the laptop and continue spraying the compressed air to reach all areas of the keyboard. Finally, wipe the surface of the keyboard with a lint-free cloth and disinfectant wipes to remove stains and germs.
How do I shake off loose debris from my Macbook keyboard?
Begin the cleaning process by turning off your Macbook and gently shaking it over a trashcan. This will help dislodge any loose dirt, dust, or food crumbs that may have accumulated beneath the keys. It is recommended to tap all the keys on the keyboard repeatedly before shaking it again to further dislodge any debris. While you may not see a significant amount of debris falling out, this step is essential to prepare the keyboard for further cleaning.
How do I use compressed air for deep cleaning my Macbook keyboard?
After shaking off the loose debris, it’s time to use a can of compressed air to achieve a deep clean. Hold your Macbook at a 75-degree angle and spray the compressed air into the keyboard. Move the compressed air from left to right, making sure to cover the entire length of the keyboard. It is important to maintain a half-inch distance between the straw of the compressed air can and the keyboard to prevent any damage. Rotate the laptop and repeat the process to ensure all pockets beneath the keys are reached. This step is especially effective for removing dirt, dust, and debris from the keyboard.
How do I wipe down the surface of my Macbook keyboard?
Once you have used compressed air to remove debris, it’s time to wipe down the surface of your Macbook keyboard. Use a lint-free cloth to carefully dust the keyboard. Avoid using abrasive cloths or paper towels that may scratch the surface of the keys. For stubborn stains or spills, you can use disinfectant wipes or a damp cloth with gentle pressure. Make sure to avoid spraying any liquid directly onto the keyboard, as this can cause damage. Instead, apply the liquid to the cloth and then wipe down the keyboard. This step will ensure a thorough cleaning and remove any remaining dirt or grime.
Should I remove the keycaps from my Macbook keyboard for intensive cleaning?
If your Macbook keyboard requires intensive cleaning or if you notice certain keys are sticky, you can consider removing the keycaps. Keep in mind that this step is optional and should only be done if you feel comfortable with disassembling your keyboard. Carefully remove the small, medium-sized, and large keys using a flathead screwdriver or a thin piece of plastic. Take pictures before removing the keys to ensure proper reassembly. Use a damp cloth or cotton swab to clean the keycaps and the area beneath them. Be gentle to avoid damaging the delicate components. Once cleaned, reattach the keycaps by aligning them with the hooks and pressing them back into place.


