Welcome to our comprehensive guide on how to clean ears! Taking care of your ear health is essential for overall well-being, but many people are unsure about the proper techniques for cleaning their ears. In this article, we will provide you with step-by-step instructions on how to clean your ears effectively and safely.
But before we dive into the practicalities, let’s start by understanding the ear’s anatomy. By gaining a basic knowledge of how your ears work, you’ll be better equipped to care for them properly. So sit back, relax, and get ready to learn all about keeping your ears squeaky clean!
Understanding the Anatomy of the Ear
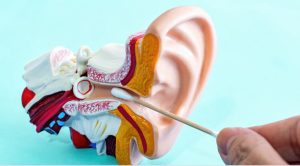
The ear is a complex and fascinating part of our body, responsible for hearing and maintaining balance. Ear consists of three main parts:
- Outer ear
- Middle ear
- Inner ear
Starting with the outer ear includes the visible part known as the pinna or auricle, which captures sound waves and directs them into the ear canal. The shape of our outer ears varies from person to person, making us all unique in how we hear.
Moving on to the middle ear, this section houses the eardrum and ossicles – tiny bones called the malleus (hammer), incus (anvil), and stapes (stirrup). When sound waves reach here, they cause vibrations that are transmitted through these bones to amplify sounds before reaching the inner ear.
The inner ear is a remarkable structure that converts sound waves into electrical signals sent to our brain. It contains delicate organs like the cochlea, which is responsible for hearing, and semicircular canals, which are crucial for maintaining balance.
Understanding this basic anatomy sets a foundation for proper care and cleaning techniques. By recognizing each component’s role in your auditory system’s functionality, you’ll be better prepared to maintain healthy ears!
Importance of Regular Ear Cleaning
Regular ear cleaning is essential to maintaining good hygiene and overall ear health. While some may overlook this important step, it’s crucial to remember that the ears are delicate organs that require attention and care.
Regular ear cleaning helps prevent the buildup of excess wax. Earwax naturally forms in the ear canal as a way to protect against dust, debris, and bacteria. However, excessive wax can lead to blockages and discomfort if left unchecked. Cleaning your ears regularly ensures that any accumulated wax is removed safely.
Proper ear cleaning can help identify potential issues early on. You may notice signs of infection or inflammation, such as redness or discharge, by routinely inspecting your ears during the cleaning process. Detecting these problems early allows for prompt medical intervention and treatment.
Regular ear cleaning promotes better hearing health. When excess wax builds up in the ear canal, it can effectively obstruct sound waves from reaching the eardrum. This may cause temporary hearing loss or sound blocking. Keeping your ears clean ensures optimal auditory function and clear communication.
Step-by-step Guide on How to Clean Ears Properly

Now that you understand the anatomy of the ear and why it’s important to keep them clean, let’s dive into a step-by-step guide on how to clean ears properly. Remember, always be gentle and cautious when performing any ear-cleaning routine.
- Gather your supplies: Start by gathering all the necessary supplies for ear cleaning. You will need a washcloth or cotton balls, warm water, hydrogen peroxide (if recommended by your doctor), and a towel.
- Soften the wax: If you have excessive ear wax buildup or are prone to blockages, it can help to soften the wax before attempting to remove it. You can do this by placing a few drops of mineral oil or baby oil in each ear canal.
- Prepare warm water: Fill a bowl with warm water at body temperature. It should not be too hot as it could cause discomfort or damage.
- Wet the washcloth/cotton ball: Dip a washcloth or cotton ball into the warm water and squeeze out any excess liquid.
- Gently clean external areas: Begin by gently wiping around the outer part of your ears using a damp washcloth or cotton ball. Avoid inserting anything into your ear canal, as this can lead to injury or push wax further inside.
- Clean behind ears: Don’t forget about cleaning behind your ears! Use gentle circular motions with your fingers and rinse thoroughly with water afterwards.
- Rinse cloth/ball frequently: Rinse out and dampen your cloth/cotton ball regularly throughout the cleaning process for effective removal of dirt and debris from external areas of ears
- Dry carefully: Dry off any excess moisture using a soft towel after finishing up so that no moisture is left trapped inside, which may increase the chances of infection
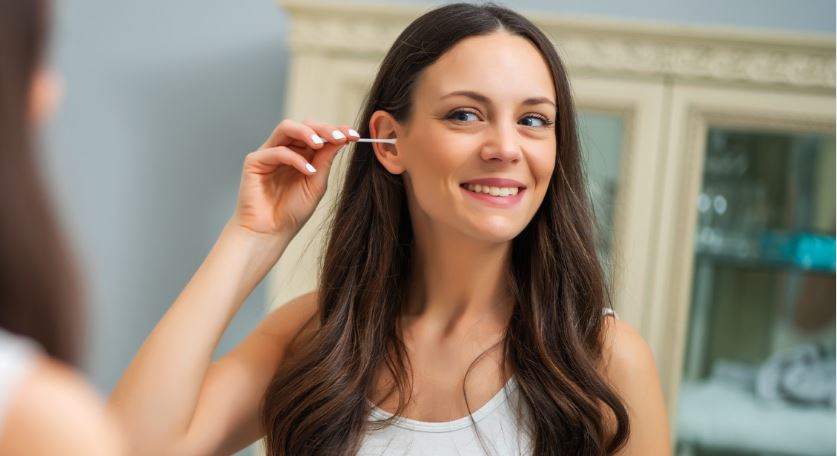
- Avoid Q-tips/Liquid solutions: Contrary to popular belief, Q-tips are unsafe for cleaning ears and can push wax further into the canal. Similarly, avoid using any type of liquid solution in your ear unless specifically recommended by a doctor.
- Seek medical help if needed: If you experience any discomfort or pain or notice changes in your hearing after cleaning your ears, it’s important to seek medical help from a healthcare professional.
Remember to always be gentle and cautious when cleaning your ears. If you have frequent ear wax buildup or are experiencing any ear issues, consult a doctor for proper care and guidance.
Natural Remedies for Ear Wax Removal
Ear wax, also known as cerumen, is a natural substance produced by the glands in our ears. While it protects and lubricates the ear canal, excessive buildup can lead to discomfort or even hearing loss. If you’re looking for alternatives to traditional ear-cleaning methods, several natural remedies may help.
- Saline solution: Mixing warm water with salt creates a gentle saline solution that can effectively soften and loosen stubborn ear wax. Simply tilt your head to one side, use a dropper to insert a few drops into the affected ear, and let it sit for a few minutes before draining.
- Olive oil: This common kitchen staple has been used for centuries as an all-natural remedy for removing excess ear wax. Warm some olive oil slightly and apply a few drops into the affected ear using a dropper or cotton ball. Leave it in for 10-15 minutes before tilting your head to drain the softened wax.
- Hydrogen peroxide: A diluted solution of hydrogen peroxide can help break down hardened wax and facilitate its removal from the ears. Mix equal parts hydrogen peroxide and water, tilt your head sideways, and carefully pour a few drops into the affected ear. Let it bubble for 5-10 minutes before gently draining.
Remember to always consult with your doctor or healthcare professional before trying any new remedies at home, especially if you have underlying health conditions or concerns about your ears’ cleanliness.
Potential Risks and Precautions

When it comes to cleaning your ears, there are a few potential risks that you should be aware of. One common risk is the possibility of damaging your ear canal or eardrum if you insert any object too far into your ear. It’s important to remember that the ear canal is delicate and sensitive, so gentle cleaning techniques are key.
Another risk to consider is the potential for infection. Using unsterilized tools or introducing bacteria into your ears while cleaning can lead to an infection. To mitigate this risk, always ensure that any tools used for cleaning are clean and sanitized properly before use.
Also, suppose you have pre-existing conditions, such as a perforated eardrum or recurring ear infections. In that case, it’s important to consult with a healthcare professional before attempting any form of ear cleaning. They can provide guidance specific to your situation and advise on the best methods for maintaining clean and healthy ears without causing harm.
By being mindful of these potential risks and taking necessary precautions, you can safely enjoy the benefits of regular ear cleaning without compromising your hearing health.
Common Misconceptions About Ear Cleaning
1. Using cotton swabs is the best way to clean ears:
Contrary to popular belief, cotton swabs can do more harm than good. They can push earwax deeper into the ear canal, potentially causing blockages or damage to the eardrum. It’s important to remember that our ears have a self-cleaning mechanism in place, and excessive cleaning can disrupt this natural process.
2. Water alone can remove all earwax:
While water can help soften earwax, it may not always be enough to completely remove it. In some cases, excess moisture left in the ear after cleaning can lead to infections or other complications. It’s advisable to use a saline solution or seek professional help if you’re experiencing significant wax buildup.
3. Ears should be cleaned daily:
Another common misconception is that ears need daily cleaning like other body parts. However, this is unnecessary and could cause irritation or injury if done too frequently. Regular hygiene practices such as gentle wiping with a washcloth during showering are usually sufficient for most individuals.
It’s crucial to debunk these misconceptions about ear cleaning so that we can prioritize safe and effective methods for maintaining healthy ears.
The Do’s and Don’ts of Ear Cleaning

When it comes to cleaning your ears, there are some important guidelines to follow. Here are the do’s and don’ts of ear cleaning:
- Do use a gentle approach: When cleaning your ears, it’s crucial to be gentle and avoid inserting anything deep into the ear canal. Use a soft cloth or tissue to clean the outer part of your ear, known as the auricle.
- Don’t use cotton swabs: Despite their widespread use, cotton swabs should never be used for cleaning inside your ears. They can push wax deeper into the ear canal, potentially causing damage or blockages.
- Do consider natural remedies: If you have excess earwax buildup and need assistance with removal, consider using natural remedies like mineral oil or hydrogen peroxide drops under the guidance of a healthcare professional.
Maintaining clean and healthy ears is essential for overall well-being, but always be cautious when caring for this delicate organ!
Conclusion
Proper ear cleaning is essential to maintaining good hygiene and preventing potential ear problems. You can safely clean your ears at home by understanding the ear’s anatomy and following step-by-step instructions in this how to clean ears article.
Remember to always be gentle, avoid inserting any objects deep into your ear canal, and seek professional help if needed. By following the dos and don’ts of ear cleaning and debunking common misconceptions, you can maintain optimal ear health and enjoy clear hearing for years to come!
FAQ
Why is regular ear cleaning important?
Regular ear cleaning is crucial for maintaining good hygiene and overall ear health. It helps prevent excessive wax buildup, identifies potential issues early on, and promotes better hearing health by ensuring optimal auditory function.
What are the risks associated with improper ear cleaning practices?
Improper ear cleaning practices can lead to risks such as damaging the ear canal or eardrum, introducing infections due to unsterilized tools, and exacerbating pre-existing conditions like a perforated eardrum. It’s essential to be cautious and gentle when cleaning ears.
Are cotton swabs safe for cleaning ears?
Contrary to popular belief, cotton swabs are not safe for cleaning inside the ears. They can push wax deeper into the ear canal, potentially causing blockages or damage. It’s best to avoid using cotton swabs and opt for gentle cleaning methods for the outer ear only.
What are some natural remedies for ear wax removal?
Natural remedies like saline solution, olive oil, and diluted hydrogen peroxide can help soften and remove excess ear wax. However, it’s important to consult with a healthcare professional before trying any new remedies at home, especially if you have underlying health conditions.
How often should ears be cleaned?
Ears do not need daily cleaning like other body parts. Regular hygiene practices such as gentle wiping during showers are usually sufficient for most individuals. It’s important to avoid overcleaning as it could lead to irritation or injury. If you suspect an issue or experience discomfort, it’s best to seek medical advice.

