Welcome to our blog post on how to clean an oven! Cleaning your oven may not be the most exciting task, but it is essential for maintaining a clean and healthy kitchen. A dirty oven can harbour grease, food debris, and even harmful bacteria, which can affect the taste of your meals and potentially pose health risks.
In this article, we will share some easy and effective cleaning hacks that will help you tackle even the toughest grime in your oven. We’ll also discuss common mistakes people make while cleaning their ovens and provide you with a step-by-step guide to ensure a thorough cleaning. So, let’s dive in and discover how to clean an oven and transform it into a sparkling appliance once again!
Why is Oven Cleaning Important?
Maintaining a clean oven is not just about aesthetics; it’s also crucial for several reasons. Regular cleaning ensures that your oven functions efficiently. Over time, grease and food residue can accumulate inside the oven, causing it to work harder and potentially affecting its performance.
A dirty oven can produce unpleasant odours when you cook. The remnants of burnt-on food or spilt sauces can release foul smells when heated up again. Cleaning your oven regularly eliminates these odours and keeps your kitchen smelling fresh.
Neglecting to clean your oven can lead to health risks. Bacteria and germs thrive in warm and moist environments like ovens if they are not properly cleaned. By removing dirt and grime from the interior of your oven, you create a healthier cooking environment for yourself and your family.
So now that we understand why keeping our ovens clean is important, let’s explore some common mistakes people make while cleaning their ovens!
Essential Tools and Products for Oven Cleaning
When it comes to cleaning your oven, having the right tools and products can make all the difference. So, before you roll up your sleeves and get to work, let’s take a look at what you’ll need.
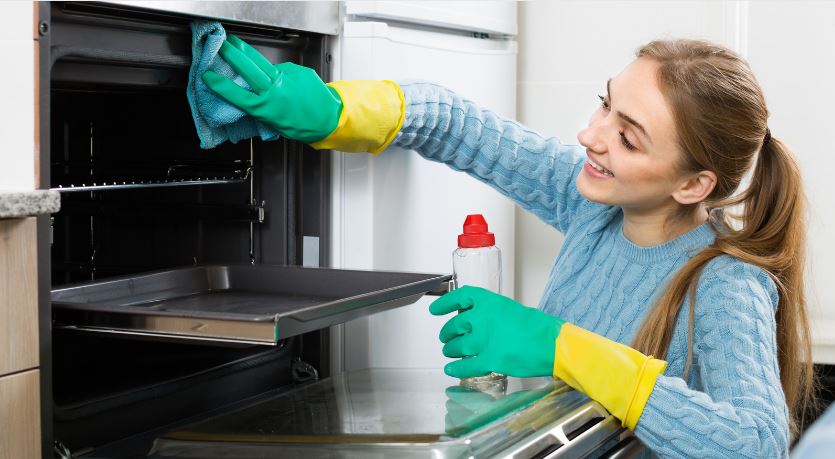
You’ll want to have a pair of rubber gloves on hand to protect your skin from harsh chemicals. Next, grab some old towels or rags that you don’t mind getting dirty. These will come in handy for wiping down surfaces and absorbing any spills.
In terms of products, there are two main options: homemade cleaners or store-bought ones. For those who prefer natural solutions, a mixture of baking soda and vinegar can work wonders. Alternatively, commercial oven cleaners are designed specifically for tough grease and grime removal.
Remember that each method has its pros and cons, so choose whichever best suits your preferences! Now that we’ve covered the essentials, let’s dive into the step-by-step guide on how to clean an oven effectively!
Step-by-step Guide on How to Clean an Oven Effectively
Cleaning an oven may seem like a daunting task, but with the right approach and some effective cleaning hacks, you can easily achieve a sparkling clean oven. Follow this step-by-step guide on how to clean an oven to ensure that your oven is thoroughly cleaned and free from grease and grime.
Preparing the Oven for Cleaning
Before diving into the actual cleaning process, it’s important to prep your oven properly. This will ensure that you have a smooth and effective cleaning experience. First, make sure your oven is completely cool before starting. Cleaning a hot oven might be risky and might harm someone. Once it’s cool, remove any loose debris or food particles from the interior using a soft brush or cloth.
Next, take out all removable parts, such as racks and trays. These can be cleaned separately to give them a thorough scrubbing without damaging other surfaces. Soak them in warm, soapy water while you tackle the rest of the oven-cleaning process.
Protect yourself by wearing gloves and putting on old clothes that you don’t mind getting dirty. Cleaning an oven can be messy work, so it’s better to be safe than sorry! Now that your oven is prepped and ready let’s move on to choosing the right cleaner for your needs!
Homemade Vs Store-bought Cleaners
When it comes to cleaning your oven, you have two main options: homemade cleaners or store-bought cleaners. Both choices have their pros and cons, so let’s explore them further.
Homemade cleaners are often favoured for their natural ingredients and cost-effectiveness. Many people prefer using ingredients they already have at home, such as baking soda, vinegar, or lemon juice. These DIY solutions can be just as effective in removing grease and grime from your oven without the harsh chemicals found in some store-bought cleaners.
On the other hand, store-bought oven cleaners are specifically formulated to tackle tough stains and baked-on residue. They often contain powerful agents that can dissolve even the most stubborn dirt. However, these commercial products may also come with strong fumes and require proper ventilation during use.
Whether you choose a homemade cleaner or a store-bought one depends on your personal preference and needs. Consider factors like effectiveness, convenience, safety concerns, and environmental impact before making your decision. It’s important to find a cleaning solution that works best for you!
Cleaning the Interior of the Oven
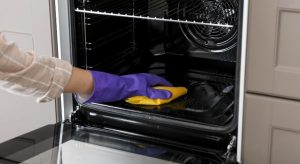
Now that you’ve prepped your oven, it’s time to tackle the interior. Start by removing any loose debris or crumbs with a dry cloth or brush. Be sure to pay attention to those hard-to-reach corners and crevices.
Next, choose your cleaning method: homemade or store-bought cleaner. If you prefer a DIY approach, mix baking soda and water into a paste and apply it generously to the interior surfaces. Let it sit for at least 30 minutes (or overnight for tougher stains) before scrubbing away with a non-abrasive sponge.
If you opt for store-bought cleaners, follow the instructions on the label carefully. Apply the product evenly over the interior surfaces and let it work its magic for the recommended amount of time before wiping clean with a damp cloth.
Remember, safety comes first! Wear gloves and ensure proper ventilation when using commercial cleaners or handling harsh chemicals. Take your time when cleaning inside your oven – thoroughness is key!
Cleaning the Exterior of the Oven
Now that we have tackled the interior, it’s time to focus on giving the exterior of your oven some much-needed attention. The outside of your oven can accumulate grease, grime, and fingerprints over time, making it look dull and dirty. But fear not! With a few simple steps, you can restore its shine and make it sparkle like new.
Start by mixing a solution of warm water and dish soap in a bucket or spray bottle. Dip a sponge or microfibre cloth into the soapy water and gently scrub the exterior surfaces of your oven. Pay special attention to any stubborn stains or built-up grease. Rinse the sponge/cloth frequently to avoid spreading dirt around.
Next, wipe down all surfaces with a clean, damp cloth to remove any remaining soap residue. For stainless steel ovens, use a stainless steel cleaner or vinegar solution for added shine. Abrasive cleansers should be avoided as they may scratch or harm the surface.
Don’t forget about those knobs and buttons! Use a toothbrush dipped in soapy water to clean these smaller components thoroughly. Dry everything off with a lint-free cloth for that finishing touch.
Cleaning the Racks and Trays
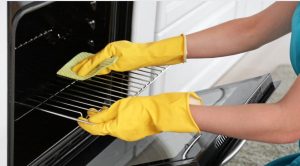
Now that the interior and exterior of your oven are sparkling clean let’s not forget about those racks and trays! These often get overlooked but can accumulate a lot of grime over time. But don’t worry, cleaning them is easier than you think!
First, remove the racks and trays from the oven. You can soak them in warm, soapy water for a while to loosen any stubborn grease or residue. Then, using a soft brush or sponge, scrub away any remaining dirt. Rinse thoroughly with water and dry them before placing them back into the oven.
For tougher stains or burnt-on food particles on the racks or trays, you can try using baking soda paste mixed with hydrogen peroxide. Apply it to the affected areas, let it sit for some time, then scrub gently until clean.
Remember to regularly wipe down your racks and trays after each use to prevent buildup. By keeping these components clean, you ensure better cooking results every time!
So there you have it – an easy way to clean your oven’s racks and trays without much hassle. Keep up with regular maintenance to maintain a fresh-smelling kitchen space!
Common Mistakes People Make While Cleaning Ovens
Cleaning an oven may seem like a simple task, but there are common mistakes that people often make along the way. These missteps can lead to ineffective cleaning or even damage to your appliance. Avoid these pitfalls by being aware of the following errors:
Neglecting regular cleaning: One of the biggest mistakes is not cleaning your oven regularly. Over time, grease and food residue build up, making it harder to remove later on. Regular maintenance will prevent stubborn stains from forming.
Using harsh chemicals: Many people resort to using strong chemical cleaners when tackling their ovens. While these products might appear effective, they can be harmful if not used properly or leave behind unpleasant odours.
Scrubbing too forcefully: Another mistake is scrubbing too aggressively with abrasive tools or scouring pads. This can cause scratches on the interior surface or damage delicate parts of the oven.
By avoiding these common errors, you’ll ensure a more efficient and safe cleaning process for your oven, resulting in a sparkling clean appliance that performs at its best!
Tips and Tricks for Maintaining a Clean Oven
To ensure that your oven remains clean and in good working condition, it’s important to incorporate some regular maintenance tips into your cleaning routine. Here are a few simple yet effective tricks for maintaining a clean oven.
Always use oven liners or baking sheets to catch spills and drips. This will prevent any food particles from accumulating at the bottom of your oven, making it easier to clean later on. Additionally, make sure to wipe down the interior of your oven after each use using a damp cloth or sponge.
Regularly check the door seal of your oven for any signs of wear or damage. A faulty seal can lead to heat loss and uneven cooking, as well as allowing grease and food debris to accumulate around the edges. If you notice any issues with the seal, consider replacing it promptly.
Don’t forget about the importance of regular deep cleaning sessions. Even if you follow all these maintenance tips diligently, there will still be times when a thorough cleaning is necessary. Set aside some time every few months to give your oven a deep cleanse using either homemade cleaners or store-bought options specifically designed for ovens.
By incorporating with how to clean an oven tips and staying proactive in maintaining a clean oven, you’ll not only prolong its lifespan but also ensure that every meal you prepare tastes its best! So go ahead and put these tricks into practice for an effortlessly sparkling oven every day.
Conclusion
Keeping your oven clean is not only important for maintaining its appearance but also for ensuring it functions properly and remains safe to use. By following this step-by-step guide on how to clean an oven and using the right tools and products, you can easily achieve a sparkling clean oven.
Remember to avoid common mistakes such as neglecting regular cleaning or using harsh chemicals that may damage your oven. Instead, opt for homemade cleaners or store-bought options specifically designed for ovens.
Cleaning both the interior and exterior of your oven is essential to remove grease, food residue, and burnt-on stains. Don’t forget to pay attention to the racks and trays as well.
To maintain a clean oven in between deep cleans, be sure to wipe up spills immediately after they occur, regularly remove crumbs from the bottom of the oven, and perform routine maintenance tasks like replacing filters or checking seals.
By incorporating these tips into your cleaning routine, you’ll have an easier time keeping your oven looking its best while enjoying delicious meals with confidence. Happy cleaning!

