Is your oil tank due for a cleaning? Regular maintenance is essential to ensure the efficient operation of your heating system and prevent any potential issues down the line. One crucial aspect of maintaining an outside oil tank is cleaning or changing the filter. A clean filter promotes better fuel flow and helps protect your heating equipment from damage caused by debris and sludge buildup.
This blog post will guide you through how to clean a filter on an outside oil tank. We will also discuss how to determine when to change the filter, safety considerations, what to do in case of leaks, and provide useful tips for cleaning domestic heating oil tank. So, let’s dive in and learn how to keep your oil tank in shape!
How to Determine If It’s Time to Change Oil Filter?
- The oil filter in your outside oil tank is crucial in keeping your heating system running smoothly. Over time, the filter can become clogged with dirt, debris, and sludge from the oil. A clogged filter restricts fuel flow and can lead to reduced efficiency or equipment failure.
- If you notice that your heating system is struggling to maintain consistent heat output or if there are frequent burner malfunctions, it could be a sign of a clogged or dirty filter.
- Another sign is an increase in fuel consumption. When the filter becomes blocked, the furnace must work harder and use more fuel to generate heat.
- You may also notice dark smoke from your chimney while the furnace runs. This can indicate that unburned fuel particles are being released into the atmosphere due to poor filtration caused by a dirty or faulty oil filter.
- Regular inspection of your oil tank’s exterior can also provide clues about whether you need to change the filter.
How to Clean a Filter on an Outside Oil Tank?
When maintaining an oil tank, one important task is cleaning and changing the filter. A dirty or clogged filter can cause inefficiencies in your heating system and may even lead to a breakdown. Here are some steps to clean and change the filter on an oil tank.
- First, ensure you have all the necessary tools: safety goggles, gloves, wrenches, and a new filter. It’s also important to turn off the power supply to your heating system before starting any work.
- Then, locate the oil filter. It is typically found near the oil burner or inside a housing unit. Use your wrenches to loosen the old filter’s fittings to the fuel line. Be prepared for some residual oil leakage when disconnecting.
- Once disconnected, remove and dispose of the old filter properly according to local regulations. Then take a moment to inspect any gaskets or O-rings for wear or damage; replace them if needed.
- Before installing a new filter, apply a thin layer of lubricant on its gasket. This will help create a tight seal when connecting it back into place. Tighten all fittings securely, but avoid over-tightening as this could cause leaks.
- Once everything is reconnected correctly, turn on your heating system again and check for any signs of leaks around the newly installed filter.
- Regularly cleaning and changing your oil tank’s filters will help keep your heating system running efficiently while prolonging its lifespan.
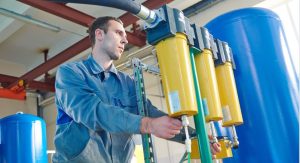
Is It Safe to Clean an Oil Tank Yourself?
Cleaning an oil tank can expose you to harmful substances such as fumes, sludge, and residue. These substances can pose serious health hazards if inhaled or come into contact with your skin. Additionally, working with flammable materials like oil increases the risk of fire or explosion.
Another factor to consider is the complexity of the cleaning process itself. Oil tanks are often located in tight spaces and require specialized equipment for proper cleaning. Without proper training and experience, attempting to clean a tank alone could lead to accidents or damage.
Furthermore, your area may have legal requirements or regulations regarding oil tank maintenance. Hiring a professional ensures compliance with these regulations and mitigates potential liability issues.
While cleaning an oil tank yourself may seem cost-effective, the potential risks outweigh the benefits. Hiring a professional with the necessary expertise and equipment for this task is safer and more efficient.
What to Do If Your Oil Tank Leaks?

Discovering a leak in your oil tank can be alarming. Still, it’s important to stay calm and take immediate action to prevent further damage and ensure the safety of yourself and others. Here are some steps you should take if your oil tank starts leaking.
1. Safety First: First, you must evacuate everyone from the area around the tank and call emergency services. Oil spills can be hazardous, posing risks of fire or contamination.
2. Contain the Leak: Avoid the leak by placing a bucket or container under the affected area. This will help minimize any potential damage caused by escaping oil.
3. Stop the Source: Locate the source of the leak and try to stop it if it’s safe. This could involve tightening fittings or valves or shutting off fuel supply lines.
4. Clean Up Spills: Clean any spilt oil using absorbent materials such as kitty litter or sand. Avoid using water as it can spread the spillage further.
5. Report It: Contact your local environmental agency or authority responsible for handling hazardous material spills in your area to report the incident and seek guidance on proper cleanup procedures.
When to Clean Your Domestic Oil Tank?
Regular maintenance and cleaning of your domestic oil tank is crucial for its optimal performance and longevity. But how do you know when it’s time to clean the tank? There are a few indicators that can help you determine when it’s necessary.
One important factor to consider is the age of your oil tank. If it has been used for several years, there may be a buildup of sediment and sludge at the bottom of the tank. This accumulation can lead to clogs in the fuel lines and reduce efficiency.
Another sign that your oil tank needs cleaning is if you notice decreased heating efficiency or inconsistent fuel flow. If your heating system isn’t performing as well as it used to, it could be due to a dirty filter or clogged fuel lines caused by debris in the tank.
Additionally, if you start experiencing unusual odours from your heating system or notice visible contaminants in your fuel filters, these are clear indications that a thorough cleaning is needed.
It’s also important to monitor any signs of leakage or damage to the oil tank. Even small leaks can allow water or dirt into the tank, contaminating the fuel supply and requiring immediate attention.
Tips for Domestic Heating Oil Tank Cleaning
- Schedule Regular Inspections: It’s important to regularly inspect your domestic heating oil tank to ensure its cleanliness and functionality. This will help you identify potential issues early on and prevent costly repairs or replacements.
- Use Protective Gear: Before cleaning, wear appropriate protective gear such as gloves, goggles, and a respirator mask. Cleaning an oil tank can expose you to harmful fumes and substances, so it’s crucial to prioritize safety.
- Choose the Right Cleaning Agents: When cleaning your oil tank’s interior, opt for biodegradable and environmentally friendly cleaning agents specifically designed for oil tanks. Avoid harsh chemicals that may damage the tank or contaminate the surrounding soil.
- Remove Sludge Buildup: Over time, sludge can accumulate at the bottom of your oil tank, reducing efficiency and potentially causing clogs in your heating system. Consider hiring a professional with experience with sludge removal techniques to remove this buildup effectively.
- Dispose of Waste Properly: Once you’ve completed the cleaning process, it’s essential to dispose of any waste materials properly according to local regulations. Improper disposal can lead to environmental pollution and legal consequences.
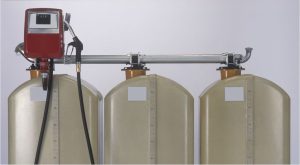
Drain the Oil Storage Tank
Draining the oil storage tank is essential in cleaning and maintaining your outside oil tank. Before cleaning or changing the filter, it’s important to ensure that all the oil has been safely drained from the tank.
To begin, you’ll need to locate the drain valve on your oil tank. This valve is typically located at the bottom of the tank and may require a wrench or pliers to open. Place a container under the valve to catch any spilt oil.
Carefully open the drain valve and allow the remaining oil in your tank to flow out. Wear protective gloves and eyewear during this process and have absorbent materials nearby in case of any spills or leaks.
Once all of the oil has been drained, it’s crucial to dispose of it properly according to local regulations. Many areas have specific guidelines for disposing of used heating oil, so follow these instructions carefully.
Remember, if you’re unsure how to drain your oil storage tank safely, it’s always best to consult a professional technician who can guide and assist throughout this process.
Clean the Tank’s Interior
To ensure the efficiency and longevity of your oil tank, it’s important to clean the tank’s interior regularly. Over time, sediment, sludge, and rust can accumulate at the bottom of the tank. This buildup can clog filters and fuel lines, leading to decreased performance and potential damage to your heating system.
Before cleaning the tank’s interior, ensure you have all necessary safety equipment, such as gloves, goggles, and respirators. Emptying the tank is also essential before starting this process.
To clean the interior of your oil tank effectively:
1. Remove any remaining oil: Carefully drain any remaining oil from the tank into a designated storage container using an approved container or pump system.
2. Scrub away debris: With a brush or scrub pad attached to a long handle, gently scrub away any accumulated debris from the walls and floor of the tank.
3. Rinse with water: Once you’ve removed as much debris as possible with scrubbing alone, rinse the inside of the tank using warm water. You may need to repeat this step multiple times until no more residue is left behind.
4. Dry thoroughly: After rinsing, allow ample time for your oil tank to air dry completely before refilling it with fresh heating oil.
Cleaning your domestic oil tank’s interior should be done carefully and regularly for optimal performance. By following these steps diligently while ensuring safety precautions are met throughout each stage of the cleaning process, minimize risks associated with sediment accumulation in your fuel supply system.
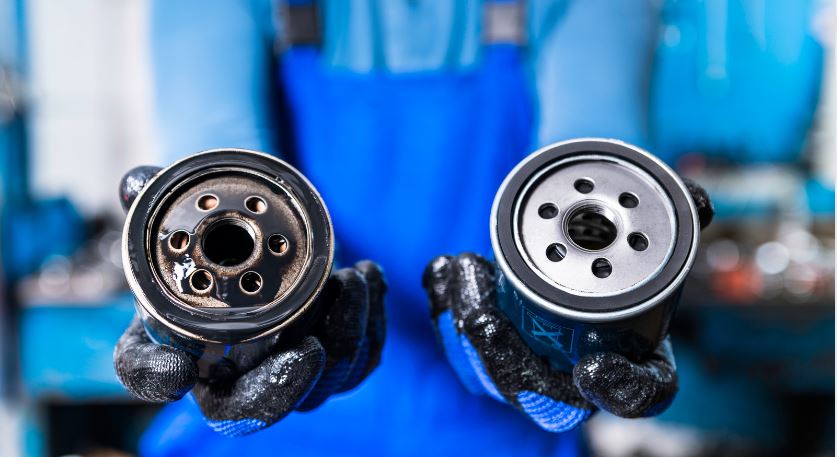
Clean the Tank Filter
One important step in cleaning an oil tank is to clean the tank filter. The filter prevents debris and contaminants from entering your heating system. Over time, this filter can become clogged with dirt, sludge, and sediment, hindering its effectiveness.
To clean the tank filter, you will need to locate it first. Most oil tanks have a small access point where the filter is located. It may be attached to the side of the tank or connected to a pipe near the bottom.
Once you have located the filter, carefully remove it from its housing. Inspect it for any signs of damage or excessive buildup that require replacement rather than just cleaning.
To gently clean the filter, use a brush or cloth to remove any visible debris. Avoid using harsh chemicals or abrasive materials, as these can damage the delicate mesh screen of the filter.
After cleaning, rinse any remaining residue with water and allow it to dry completely before reinstalling it into its housing.
Regularly cleaning your oil tank’s filter ensures that your heating system operates efficiently and helps prevent potential issues caused by clogged filters, such as reduced heat output or even system breakdowns.
Always follow safety precautions when working with an oil tank and consult a professional if unsure about any aspect of maintenance or repairs.
Ensure Proper Waste Disposal
Proper waste disposal is essential when cleaning an outside oil tank filter. It helps protect the environment and ensures your safety and compliance with regulations. Here are some important steps for proper waste disposal during this process.
It’s crucial to have a designated container for collecting and storing waste materials generated during the cleaning process. This container should be leak-proof, sturdy, and labelled “hazardous waste.”
Never pour the collected waste materials down drains or into regular trash bins when disposing of them. Instead, contact your local authorities or a licensed hazardous waste disposal company to handle the proper removal of these materials. They have the expertise and equipment necessary to dispose of hazardous substances safely.
It’s important to note that improper disposal of oil-related waste can lead to serious environmental contamination and harm human health and wildlife habitats. By ensuring proper waste disposal procedures are followed, you contribute towards protecting our ecosystem.
Always prioritize safety by wearing appropriate protective gear throughout the cleaning process. Stay informed about local regulations regarding hazardous material disposal so you can adhere to them without fail.
By following these guidelines for proper waste disposal when cleaning an outside oil tank filter, you maintain a clean environment and demonstrate responsible stewardship in caring for our planet.
Conclusion
Maintaining a clean and properly functioning oil filter is crucial for the efficiency and longevity of your outside oil tank. Regularly inspecting and cleaning the filter ensures that your heating system operates smoothly without any disruptions.
Remember always to prioritize safety when working with an oil tank. If you are unsure or uncomfortable with cleaning, it’s best to contact a professional technician with the experience and knowledge to handle these tasks safely.
In case of a leak or any signs of damage to your oil tank, immediately contact an expert. Ignoring such issues can result in costly repairs or even environmental hazards.
To determine when to clean your domestic oil tank, watch for warning signs such as reduced heat output, frequent breakdowns, or strange noises from the heating system. Regular maintenance will help prevent these problems from occurring in the first place.
When cleaning your domestic heating oil tank, follow proper procedures, such as draining all fuel before starting. Clean not only the interior but also pay attention to maintaining a clean filter.
By following these steps and taking proactive measures to care for your outside oil tank’s filter cleanliness, you can enjoy efficient heating throughout colder months while avoiding potential issues. Stay safe and warm!