Are you tired of your Shark Hoover losing its suction power? Do you notice a funky smell lingering every time you use it? If so, then it’s high time to give your trusty cleaning companion some TLC. Cleaning your Shark Hoover regularly not only ensures optimal performance but also prolongs its lifespan.
In this blog post, we’ll take you through a step-by-step guide on how to clean a Shark Hoover effectively and effortlessly. From disassembling the parts to washing or replacing the brush roll, we’ve got you covered. So grab your rubber gloves, and let’s dive into the world of Shark Hoover maintenance!
What is a Shark Hoover?
When it comes to keeping your home clean and dust-free, a Shark Hoover is a reliable and powerful tool. But what exactly is a Shark Hoover? Simply put, it’s a brand of vacuum cleaner known for its innovative design and impressive performance.
Unlike traditional vacuums, the Shark Hoover boasts advanced technology that ensures maximum suction power. Its sleek and compact design makes manoeuvring around furniture and tight spaces effortlessly. With various models available, you can choose one that suits your cleaning needs – whether it’s for carpets, hardwood floors, or even pet hair removal.
One of the standout features of the Shark Hoover is its bagless system. Instead of using disposable bags that need constant replacement, this vacuum utilises an easy-to-empty dust canister. This not only saves you money in the long run but also reduces waste.
Moreover, many models come with HEPA filters – high-efficiency particulate air filters – which trap allergens and improve indoor air quality. So, if you suffer from allergies or have pets at home who shed fur constantly, investing in a Shark Hoover with HEPA filtration can make all the difference.
A Shark Hoover is more than just a regular vacuum cleaner; it’s an efficient cleaning companion designed to make your life easier with its cutting-edge technology and user-friendly features like swivel steering and detachable accessories for versatile cleaning options. It’s time to unleash the power of your Shark Hoover by giving it some well-deserved care and maintenance!
Why is It Important to Clean Your Shark Hoover Regularly?
Regularly cleaning your Shark Hoover is not just a chore; it is an essential task that ensures the optimal performance and longevity of your vacuum cleaner. Neglecting to clean your Hoover can lead to a host of problems, including decreased suction power, clogged filters, and even unpleasant odours.
Regular cleaning helps maintain the suction power of your Shark Hoover. Over time, dust and debris accumulate in the various parts of the hoover, such as the brush roll, hose, and attachments. This buildup can restrict airflow and reduce suction power. By regularly cleaning these components, you ensure that your hoover operates at its maximum potential.
Proper maintenance prevents clogging in filters and dust canisters. The filters collect fine particles like dirt and allergens during vacuuming. If they are not cleaned or replaced regularly, they become blocked with accumulated debris, which hampers their efficiency. Likewise, neglecting to empty the dust canister leads to a reduced capacity for collecting dirt.
Step-by-step Guide on How to Clean a Shark Hoover
Cleaning your Shark Hoover is an essential task to keep it functioning at its best and maintain a clean and healthy living environment. By following this step-by-step guide on how to properly clean your Shark Hoover, you can ensure that it continues to provide effective performance for years to come.
Disassembling the Parts of the Hoover
When it comes to cleaning your Shark hoover, one important step is disassembling its various parts. This allows for a thorough and effective cleaning process. Before you begin, make sure to switch off and unplug the hoover for safety.
Start by removing the dust canister from the main body of the hoover. Most models have a latch or release button that will allow you to remove this part easily. Take care not to spill any dirt or debris as you do this.
Next, locate the filters in your Shark hoover. These filters play a crucial role in trapping dust and allergens, so it’s essential to clean them regularly. Depending on your model, there may be one or more filters that need attention. Remove each filter carefully and follow the manufacturer’s instructions for proper cleaning techniques.
To ensure optimal performance, don’t forget about the brush roll! This component collects hair and other debris while vacuuming. To access it, flip over your Shark hoover and remove any screws holding down a cover plate if necessary. Once exposed, gently pull out the brush roll assembly and inspect it for tangled hair or obstructions before proceeding with cleaning.
Detach any hoses or attachments from their respective connectors on your Shark hoover. Rinse them under warm water using a mild detergent if needed; otherwise, wipe clean with a damp cloth.
Cleaning the Dust Canister and Filters

One of the most important steps in cleaning your Shark Hoover is to clean the dust canister and filters. Over time, these components can become clogged with dirt, dust, and debris, which can affect the performance of your hoover.
To start, you’ll want to remove the dust canister from the Shark Hoover. Most models have a release button or latch that allows for easy removal. Once removed, empty any contents into a rubbish bag or bin.
Next, it’s time to tackle the filters. Depending on your model, you may have both foam and HEPA filters. Start by checking your user manual for specific instructions on how to remove them.
Once removed, gently tap them against a hard surface to dislodge any loose debris. For more stubborn dirt or buildup, you can rinse them under running water using a mild soap if necessary. Be sure to let them air dry completely before reinstalling them.
While washing the filters is often sufficient for regular maintenance, depending on usage and filter condition, they may need to be replaced every few months or so.
Regularly cleaning out your dust canister and filters will ensure maximum suction power and efficiency when using your Shark Hoover!
Washing or Replacing the Brush Roll
Washing or replacing the brush roll of your Shark Hoover is an essential step in keeping it running at its best. Over time, dirt and debris can become trapped in the bristles, hindering its performance. To ensure optimal cleaning power, you’ll want to clean or replace this key component regularly.
To wash the brush roll:
- Start by unplugging your Shark Hoover and removing any visible clumps of hair or debris that may be tangled around it
- Remove the brush roll from the vacuum by following the manufacturer’s instructions
- Once removed, use a pair of scissors or a seam ripper to carefully cut away any hair that may be wrapped tightly around the bristles.
After removing as much hair as possible:
- Fill a sink or basin with warm water and add a few drops of mild detergent.
- Place the brush roll into the soapy water and gently agitate it to loosen any remaining dirt.
- Rinse thoroughly under running water until all soap residue is gone.
To dry the brush roll, shake off excess moisture and lay it flat on a clean towel. Allow it to air dry completely before reinstalling it back into your Shark Hoover.
If your brush roll is worn out or damaged beyond repair, you will need to replace it with a new one. Refer to your user manual for specific instructions on how to purchase and install a replacement brush roll for your model Shark Hoover.
Regularly washing or replacing this vital component will not only help maintain strong suction power but also extend the lifespan of your Shark Hoover overall! So don’t neglect this important step when cleaning your vacuum!
Cleaning the Hose and Attachments
One important step in cleaning your Shark Hoover is to clean the hose and attachments. Over time, dust, debris, and pet hair can accumulate inside the hose, reducing its suction power. Cleaning these parts regularly ensures that your hoover performs optimally.
To begin cleaning the hose, detach it from the main body of the hoover. Inspect it for any blockages or clogs. If you find any, use a long object such as a broom handle or wire hanger to gently remove them.
Next, fill a sink or basin with warm water and add a little amount of mild detergent. Submerge both ends of the hose into the soapy water and allow it to soak for about 10 minutes. After soaking, use a brush with soft bristles to scrub away any dirt or grime on the surface of the hose.
For attachments such as brushes and crevice tools, remove them from the hoover’s body and rinse them under running water. Use a toothbrush or small brush to remove any stubborn dirt or debris trapped in hard-to-reach areas.
After cleaning all parts thoroughly, rinse everything with clean water until no soap residue remains. Allow all components to air dry completely before reattaching them to your Shark Hoover.
Reassembling the Hoover
Now that you have successfully cleaned all the individual parts of your Shark Hoover, it’s time to put everything back together. Reassembling the Hoover is a straightforward process that requires just a few simple steps.
Take each component and line them up in front of you so you can easily see how they fit together. This will help prevent any confusion or mistakes during reassembly.
Next, carefully connect the hose to the main body of the Hoover. Make sure that it is securely attached and properly aligned.
Then, insert the dust canister back into its designated slot on the unit. Make sure it fits snugly and clicks into place.
After that, reattach any additional attachments, such as brushes or crevice tools, by aligning them with their respective connection points and pushing until they click into position.
Give each part a gentle shake or wiggle to ensure everything is secure before using your Shark Hoover again.
Common Mistakes to Avoid While Cleaning Your Shark Hoover
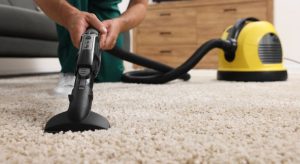
When it comes to cleaning your Shark Hoover, there are a few common mistakes that you should steer clear of. By avoiding these errors, you can ensure that your hoover stays in top condition and continues to provide optimal performance.
One mistake is neglecting to disassemble the parts properly before cleaning. It’s essential to follow the manufacturer’s instructions and remove all detachable components before starting the cleaning process. This will allow for a more thorough cleaning and prevent any damage or breakage.
Another mistake is not emptying the dust canister regularly. Neglecting this step can lead to reduced suction power and overall efficiency of your hoover. Remember to empty the dust canister after every use or when it reaches its maximum capacity.
Using harsh chemicals or abrasive cleaners is another common mistake that many people make while trying to clean their Shark Hoover. These products can cause damage to delicate parts of your hoover, such as filters and brush rolls. Stick with mild soap and water for most cleaning tasks.
Neglecting to clean or replace the filters on a regular basis is another pitfall that many fall into. Filters play a crucial role in trapping fine particles from escaping back into the air during vacuuming. By keeping them clean, you’ll maintain proper airflow and maximise suction power.
Rushing through the reassembly process after cleaning is a mistake that could result in misaligned parts or even potential malfunctioning of your Hoover. Take your time when putting everything back together according to the manufacturer’s guidelines.
By avoiding these common mistakes while cleaning your Shark Hoover, you’ll prolong its lifespan and ensure optimal performance with each use!
Conclusion
Keeping your Shark Hoover clean is essential for maintaining its performance and prolonging its lifespan. By following the step-by-step instructions outlined in this How to Clean a Shark Hoover article, you can ensure that your Hoover remains in top condition, effectively removing dirt and debris from your floors.
Regularly disassembling and cleaning the various parts of your Shark Hoover, such as the dust canister, filters, brush roll, hose, and attachments, will keep it operating at its best. Remember to avoid common mistakes like using harsh chemicals or rushing through the process.
By taking good care of your Shark Hoover, you’ll not only save money in the long run but also ensure a clean and healthy living environment for you and your family. So don’t forget to give your trusty cleaning companion some well-deserved TLC!


